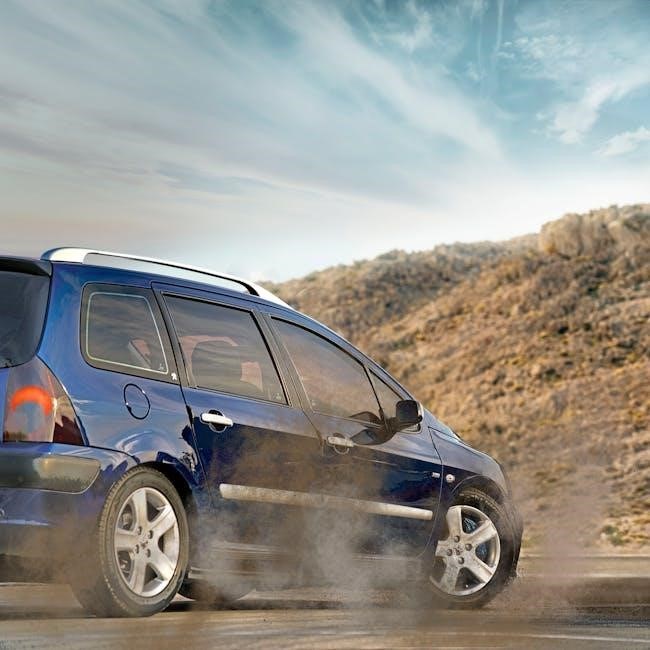
Rear-wheel-drive (RWD) manual cars deliver a unique driving experience‚ combining raw power with precise control. They offer a level of engagement and driver involvement that automatic or front-wheel-drive cars cannot match.
Drivers seeking thrill and precision often choose RWD manuals for their superior handling‚ customization potential‚ and the joy of mastering a manual transmission. They remain a favorite among automotive enthusiasts.
1.1 What is a RWD Manual Car?
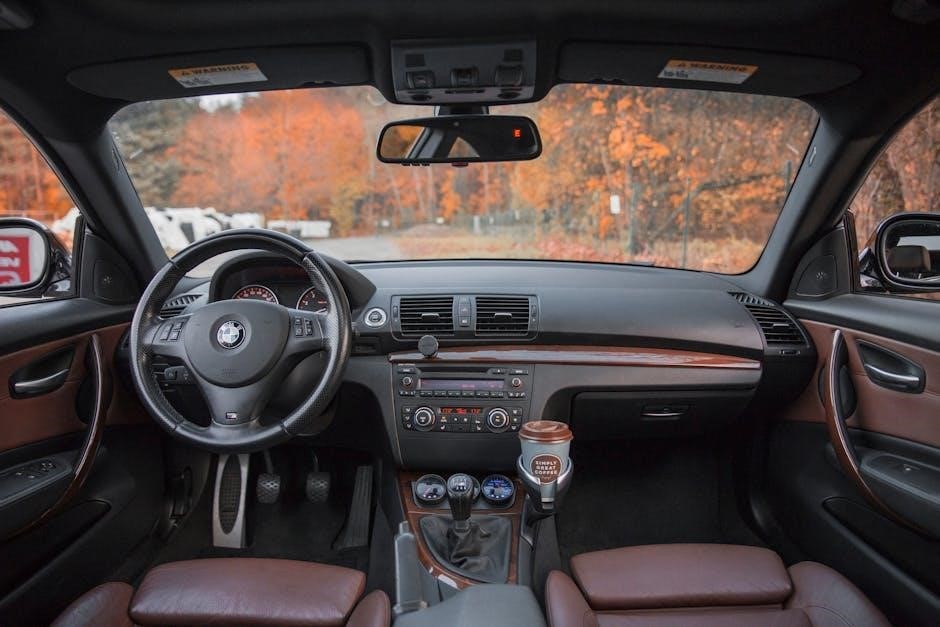
A Rear-Wheel-Drive (RWD) manual car is a vehicle where power is sent exclusively to the rear wheels‚ paired with a manual transmission system. This setup requires the driver to manually shift gears using a clutch pedal and gearshift‚ offering precise control over acceleration and braking. RWD manual cars are prized for their engaging driving experience‚ superior handling‚ and often better fuel efficiency compared to automatic or front-wheel-drive alternatives. They remain a favorite among automotive enthusiasts seeking a more connected and dynamic driving experience.
1.2 Why Choose a RWD Manual Car?
Choosing a RWD manual car offers a blend of performance‚ efficiency‚ and driving satisfaction. These cars provide better fuel economy‚ lower ownership costs‚ and a more engaging experience compared to automatics. The manual transmission allows drivers to feel more connected to the vehicle‚ enhancing control and enjoyment. Additionally‚ RWD cars are often easier to maintain and customize‚ making them a practical choice for enthusiasts. They also deliver a smoother ride and the thrill of driving‚ appealing to those who value both fun and functionality behind the wheel.
History and Evolution of RWD Manual Cars
The RWD manual car traces its origins to the early 20th century‚ evolving through decades of innovation. Initially popular for simplicity and efficiency‚ manual transmissions became a cornerstone of automotive design‚ especially in rear-wheel-drive vehicles. Over time‚ advancements in engineering and technology refined these systems‚ blending performance with practicality and cementing their place in automotive history.
2.1 The Origins of Rear-Wheel-Drive (RWD)
The origins of Rear-Wheel-Drive (RWD) trace back to the late 19th century‚ with early automobiles like the Benz Patent-Motorwagen. This design‚ where power is sent to the rear wheels‚ offered simplicity and better traction for early road conditions. It became the standard for decades‚ dominating automotive engineering due to its straightforward mechanics. The RWD layout enhanced control and performance‚ making it popular in racing and sports cars. Although front-wheel-drive (FWD) gained prominence‚ RWD remains a favorite among driving enthusiasts and for heavy-duty applications.
2.2 The Development of Manual Transmissions
The manual transmission emerged in the late 19th century‚ with early versions offering limited gear ratios. Innovators like Louis-René Panhard and Emile Levassor pioneered the modern manual gearbox in the 1890s. Over time‚ advancements like the synchromesh system in the 1920s improved shifting smoothness. Modern manuals feature lightweight materials and computer-aided design‚ enhancing performance and efficiency. The manual transmission remains a hallmark of RWD cars‚ offering drivers direct control and a deeper connection to the vehicle.

Advantages of RWD Manual Cars
RWD manual cars offer enhanced driving engagement‚ improved fuel efficiency‚ and lower ownership costs compared to automatics‚ making them a popular choice for enthusiasts.
3.1 Enhanced Driving Experience
RWD manual cars provide a more engaging and immersive driving experience. The direct connection between the driver and the vehicle‚ via the manual gearbox‚ enhances control and precision. Rear-wheel drive allows for better weight transfer during acceleration‚ making the car feel more responsive and agile. This setup is particularly rewarding for enthusiasts who appreciate the thrill of driving‚ as it requires skill and attentiveness‚ creating a more satisfying and connected experience behind the wheel.
3.2 Better Fuel Efficiency
RWD manual cars often offer better fuel efficiency compared to automatic or all-wheel-drive counterparts. Manual transmissions generally have fewer mechanical components‚ reducing energy loss and improving mileage. Rear-wheel drive systems are lighter‚ further enhancing fuel economy. Additionally‚ drivers can optimize gear shifts to minimize fuel consumption‚ making RWD manuals a cost-effective choice for those seeking both performance and efficiency without the added weight and complexity of other drivetrain options.
3.3 Lower Cost of Ownership
RWD manual cars typically have a lower cost of ownership compared to automatic or all-wheel-drive vehicles. Manual transmissions are simpler in design‚ reducing production and repair costs. Rear-wheel-drive systems also tend to be less complex and lighter‚ leading to lower maintenance expenses. Additionally‚ insurance premiums for RWD manual cars are often lower‚ and replacement parts are generally more affordable. This makes them a practical choice for budget-conscious drivers seeking long-term savings without compromising on performance.
3.4 Customization and Tuning Potential
RWD manual cars are highly sought after by enthusiasts due to their exceptional customization and tuning potential. The simplicity of rear-wheel-drive systems and manual transmissions makes them easier to modify. Drivers can enhance performance through engine swaps‚ suspension upgrades‚ and lightweight components. Additionally‚ the availability of aftermarket parts and tuning options allows owners to tailor their vehicles to suit their driving style and preferences. This flexibility makes RWD manual cars a favorite among car enthusiasts looking to personalize their rides for both performance and aesthetics.

Popular RWD Manual Cars
RWD manual cars offer a range of popular models‚ from modern performance vehicles like the Mazda MX-5 Miata to classic icons such as the Toyota GR 86. These cars are celebrated for their engaging driving experience and availability in manual transmissions‚ making them favorites among enthusiasts. Their timeless appeal continues to attract drivers seeking precision and control behind the wheel.
4.1 Modern RWD Manual Cars
Modern RWD manual cars like the Toyota GR 86‚ Subaru BRZ‚ and Mazda MX-5 Miata are popular for their precise handling and engaging driving experience. These cars feature lightweight designs‚ aerodynamic styling‚ and responsive engines‚ making them ideal for enthusiasts. The Ford Mustang and Chevrolet Camaro also offer manual transmissions‚ blending classic muscle with modern tech. These vehicles prioritize driver connection‚ offering a purist’s delight with sharp steering and rear-wheel-drive dynamics.
4.2 Classic RWD Manual Cars
Classic RWD manual cars‚ such as the BMW E30 M3‚ Mazda RX-7‚ and Nissan 350Z‚ are revered for their timeless appeal and driving purity. These models often feature simple‚ lightweight designs paired with manual transmissions‚ offering a direct connection to the road. The Ford Mustang from the ’60s and the Chevrolet Camaro are iconic examples‚ blending power with rear-wheel-drive precision. These classics are sought after by collectors and enthusiasts‚ embodying the essence of driving at its most authentic and engaging.
4.3 Affordable RWD Manual Cars for Beginners
Affordable RWD manual cars like the Mazda MX-5 Miata‚ Toyota 86‚ and Ford Mustang EcoBoost are ideal for beginners. These models offer a perfect blend of performance‚ reliability‚ and cost-effectiveness. The Hyundai Veloster N and Nissan 370Z also provide great value‚ combining sporty dynamics with manageable pricing. These cars are excellent for learning the ropes of manual driving and rear-wheel-drive handling without breaking the bank. They are reliable‚ fun‚ and serve as a gateway to the world of performance driving.

Driving Techniques for RWD Manual Cars
Mastering smooth acceleration‚ precise gear shifts‚ and balance is key. Throttle control and weight transfer management enhance stability. Practice in safe environments helps build confidence and skill.
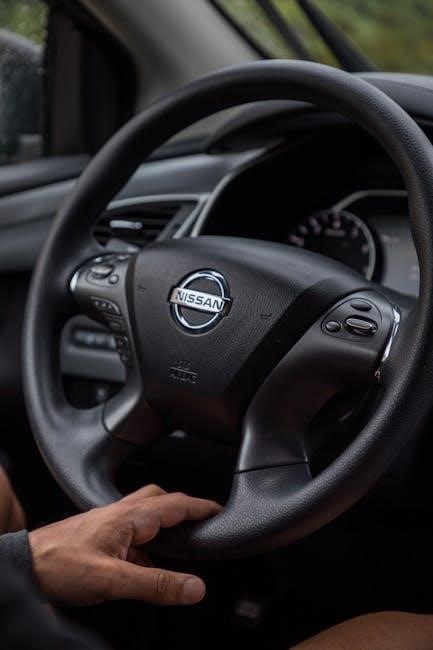
5.1 Mastering the Manual Transmission
Mastering the manual transmission in a RWD car requires smooth clutch engagement and precise gear shifts. Coordinate clutch pedal release with accelerator input for seamless acceleration. Practice slow-speed maneuvers to build muscle memory. Avoid riding the clutch to prevent wear. Use the correct gear for the situation‚ ensuring optimal control and torque delivery. Regular practice in a safe environment helps refine shifting techniques and improves overall drivability.
5.2 Handling Rear-Wheel Drive Dynamics
Rear-wheel drive cars offer precise handling and responsiveness‚ making them ideal for spirited driving. Weight transfer to the rear axles enhances traction during acceleration. However‚ RWD vehicles can be more challenging to control‚ especially on slippery surfaces. Drivers should use smooth throttle inputs and subtle steering to maintain stability. Avoiding abrupt movements helps prevent loss of traction. Mastering these techniques enhances control and driving enjoyment‚ making RWD cars a favorite among enthusiasts.
5.3 Advanced Driving Tips for RWD Cars
Mastering advanced techniques for RWD manual cars requires finesse and practice. Use gentle throttle inputs to avoid wheel spin during acceleration. Employ weight transfer by braking in a straight line before turning. Heel-to-toe downshifting enhances braking efficiency and smoothness. Look ahead to anticipate corners and adjust your line accordingly. Practice in a controlled environment to refine your skills. These techniques enhance precision‚ control‚ and overall driving satisfaction in rear-wheel-drive vehicles.

Maintenance and Care for RWD Manual Cars
Regular fluid checks‚ transmission maintenance‚ and brake inspections are essential for RWD manual cars. Proper care ensures longevity and optimal performance of the vehicle.
6.1 Routine Maintenance Requirements
Regular maintenance for RWD manual cars includes checking engine oil‚ transmission fluid‚ and differential lubrication. Replacing air and fuel filters‚ spark plugs‚ and timing belts at recommended intervals is crucial. Inspecting the drivetrain and exhaust system for leaks or damage ensures optimal performance. Proper tire rotation and alignment are also necessary to maintain handling and reduce wear. Adhering to a maintenance schedule helps prevent breakdowns‚ ensuring reliability and longevity of the vehicle while maintaining its efficiency and performance.
6.2 DIY vs. Professional Maintenance
For RWD manual cars‚ DIY maintenance can save costs and foster a deeper connection with the vehicle. Simple tasks like oil changes‚ filter replacements‚ and basic inspections can be handled by enthusiasts with proper tools and knowledge. However‚ complex repairs‚ such as transmission overhauls or drivetrain adjustments‚ often require professional expertise to avoid costly errors.
Professional maintenance ensures precision and warranty compliance‚ especially for modern vehicles with advanced systems. Balancing DIY efforts with professional services is key to maintaining reliability and performance while preserving the car’s value. Knowing your limits is essential for safe and effective maintenance.

Safety Considerations for RWD Manual Cars
Safety in RWD manual cars depends on driver skill‚ vehicle control‚ and awareness. Proper handling techniques and regular maintenance are crucial to prevent accidents and ensure reliability.
7.1 Safety Features in Modern RWD Cars
Modern RWD manual cars are equipped with advanced safety features like Electronic Stability Control (ESC) and Anti-lock Braking Systems (ABS) to enhance traction and prevent skidding. Traction Control Systems (TCS) optimize power delivery‚ reducing wheel spin. Airbags‚ including side and curtain variants‚ provide comprehensive protection. Many models also feature Lane Departure Warning (LDW) and Blind Spot Monitoring (BSM) for improved driver awareness. Additionally‚ Tire Pressure Monitoring Systems (TPMS) ensure optimal tire conditions‚ further enhancing safety on the road.
7.2 Safe Driving Practices for RWD Vehicles
Safe driving practices for RWD manual cars emphasize smooth acceleration and avoiding sudden movements‚ as rear-wheel-drive vehicles can lose traction easily. Drivers should control speed on slippery surfaces and use gentle steering to maintain stability. Proper tire pressure and winter tires are essential for improved grip. Avoiding aggressive driving and keeping a safe distance are critical. Practicing in empty spaces helps master control‚ especially for new drivers. Always stay alert and focused‚ as RWD cars can behave unpredictably in adverse conditions.
Technology in Modern RWD Manual Cars
Modern RWD manual cars feature advanced driver-assistance systems‚ performance-enhancing technologies‚ and lightweight materials‚ combining classic driving appeal with cutting-edge innovation for improved efficiency and safety.
8.1 Advanced Driver-Assistance Systems (ADAS)
Modern RWD manual cars now feature sophisticated ADAS‚ including adaptive cruise control‚ lane-keeping assist‚ and automatic emergency braking. These systems enhance safety without compromising the engaging driving experience. Blind-spot monitoring and rear cross-traffic alert further improve awareness‚ while advanced stability control ensures precise handling. Despite these innovations‚ the manual transmission remains central to the driving experience‚ offering a perfect blend of technology and driver involvement. These advancements make RWD manual cars safer and more accessible to a broader audience.
8.2 Performance Enhancing Technologies
Modern RWD manual cars incorporate performance-enhancing technologies like turbochargers‚ superchargers‚ and direct fuel injection for improved power delivery. Lightweight materials‚ such as carbon fiber and aluminum‚ reduce weight while maintaining strength. Aerodynamic designs‚ including spoilers and air diffusers‚ enhance stability at high speeds. Advanced engine management systems optimize performance‚ and features like variable valve timing ensure efficient power output. Limited-slip differentials improve traction‚ making these cars thrilling to drive on both roads and tracks.
Buying Tips for RWD Manual Cars
Set a budget‚ research reliable models‚ and check the car’s history. Inspect for wear on the clutch and transmission. Test drive to assess performance and comfort.
9.1 What to Look for When Purchasing a Used RWD Manual Car
Inspect the transmission and clutch for wear‚ ensuring smooth shifting. Check the rear differential for leaks or damage. Test the drivetrain and suspension for alignment issues. Review maintenance records for regular servicing. Look for signs of wear on tires and brakes. Ensure proper alignment for even tire wear. Test drive on various roads to assess handling and performance. Verify the car’s history to avoid hidden problems. A pre-purchase inspection by a mechanic is highly recommended.
9.2 Test Driving a RWD Manual Car
Start with a slow drive to assess clutch and accelerator feel. Shift smoothly through all gears to ensure precision. Test on various roads to evaluate handling and responsiveness. Check for unusual noises during acceleration or cornering. Drive uphill to test hill-start capability. Brake gently to gauge control. Ensure the car remains stable on straight roads and responsive on winding paths. Avoid sudden movements and focus on smooth transitions. Pay attention to how the car feels overall to make an informed decision.

RWD Manual Cars for Family Use
RWD manual cars can balance practicality and performance for families‚ offering reliability‚ comfort‚ and sufficient space for passengers and cargo while maintaining driving enjoyment and safety.
10.1 Balancing Practicality and Performance
RWD manual cars offer a unique blend of practicality and performance‚ making them suitable for families. They provide ample space‚ reliability‚ and fuel efficiency while delivering engaging driving dynamics. Many modern models feature spacious interiors‚ advanced safety features‚ and sufficient cargo capacity‚ catering to daily family needs without compromising on the joy of driving. This balance makes them an excellent choice for families seeking both functionality and exhilaration behind the wheel.
- Spacious interiors for passengers and cargo.
- Reliable performance for daily commuting.
- Engaging driving experience for enthusiasts.
- Advanced safety features for family protection.

The Future of RWD Manual Cars
The future of RWD manual cars involves integrating eco-friendly technologies while maintaining performance. Hybrid and electric versions emerge‚ appealing to enthusiasts seeking sustainable thrills.
- Emerging technologies like hybrid and electric powertrains.
- Increased focus on sustainability without compromising performance.
- Niche appeal for driving purists in an automated world.
11.1 The Rise of Electric and Hybrid RWD Cars
The automotive industry is witnessing a shift toward electric and hybrid RWD manual cars‚ blending sustainability with performance. These vehicles retain the thrill of manual driving while reducing emissions. Advances in battery technology and dual-motor systems enable better torque distribution‚ enhancing handling. Hybrid models combine fuel efficiency with the responsiveness of RWD‚ appealing to eco-conscious enthusiasts. This trend ensures that RWD manual cars remain relevant in an increasingly electrified future.
- Electric RWD cars offer instant torque and precise control.
- Hybrid systems optimize fuel efficiency without sacrificing performance.
- Lightweight materials and advanced batteries improve range and agility.
- Manual transmissions remain a niche option for driving purists.
RWD manual cars offer a unique blend of performance‚ control‚ and driving satisfaction. With a rich history and ongoing innovations‚ these vehicles continue to captivate enthusiasts. Whether for thrill-seekers or practical drivers‚ RWD manual cars provide a timeless driving experience. As technology evolves‚ their legacy endures‚ ensuring they remain a beloved choice for years to come. For those who value precision and passion behind the wheel‚ RWD manual cars are an unforgettable ride.
They embody the spirit of driving at its purest.