The Pride Go-Chair is a state-of-the-art mobility solution designed to enhance independence and comfort for users. It offers portability, ease of use, and advanced features for everyday convenience. Pride Mobility ensures this power chair meets high standards of quality and performance, making it an ideal choice for individuals seeking reliable mobility assistance. The Go-Chair is part of Pride’s innovative product line, focusing on user-centric design and functionality.
1.1 Overview of the Pride Go-Chair
The Pride Go-Chair is a state-of-the-art mobility solution offering portability, ease of use, and customization. Designed to enhance independence, it features lightweight construction, intuitive controls, and versatile designs. With advanced features like manual freewheel levers and safety guidelines, the Go-Chair ensures a seamless experience. Pride Mobility prioritizes quality and innovation, making this power chair a reliable choice for users seeking advanced mobility assistance and comfort in daily life.
1.2 Importance of Reading the Manual
Reading the Pride Go-Chair manual is mandatory before first use to ensure safe and proper operation. The manual provides critical information on safety guidelines, controls, and maintenance to prevent accidents or equipment damage. Understanding the instructions helps users maximize the chair’s features and longevity. Ignoring the manual may lead to improper use, safety risks, or voiding the warranty. Always follow the guidelines to ensure optimal performance and user satisfaction.

Key Features and Benefits
The Pride Go-Chair offers portability, ease of use, and customization, making it a versatile choice. Its lightweight design and user-friendly controls ensure convenience and independence for users.
2.1 Design and Portability
The Pride Go-Chair features a sleek, lightweight design that prioritizes portability and ease of transport. Its compact frame and foldable construction make it ideal for storage and travel. Designed for durability, the chair ensures stability and comfort while navigating various terrains. The ergonomic design caters to user needs, providing an optimal balance between mobility and convenience, making it a practical choice for daily use and adventures on the go.
2.2 Ease of Use and Maneuverability
The Pride Go-Chair is designed for intuitive operation, featuring easy-to-use controls that ensure smooth navigation. Its compact design allows for excellent maneuverability in tight spaces, making it ideal for both indoor and outdoor use. The chair also includes manual freewheel levers, enabling attendants to assist with movement when needed. With its responsive handling and straightforward functionality, the Go-Chair provides a seamless experience, ensuring users can operate it with confidence and ease, regardless of their skill level.
2.3 Customization Options
The Pride Go-Chair offers a range of customization options to meet individual needs. Users can adjust the seat height, armrests, and footplates for optimal comfort. Additional accessories, such as storage baskets and cup holders, enhance functionality. Pride Mobility provides a variety of color choices, allowing users to personalize their chair’s appearance. These customization options ensure the Go-Chair is tailored to each user’s lifestyle, providing a comfortable and accessible mobility solution that aligns with personal preferences and requirements.
Safety Guidelines
Always read and follow the owner’s manual carefully before operating the Pride Go-Chair. Understand warning symbols and safety precautions to ensure safe and proper use of the device.
3.1 Warning Symbols and Their Meanings
The Pride Go-Chair manual includes specific warning symbols to alert users of potential hazards. These symbols are displayed throughout the manual and on the chair itself. They indicate important safety information, such as proper usage, weight limits, and maintenance guidelines. Understanding these symbols is crucial for safe operation and to avoid damaging the device. Neglecting these warnings may result in injury or void the warranty. Always refer to the manual for detailed explanations.
3.2 Precautions Before First Use
Before using the Pride Go-Chair for the first time, ensure all components are thoroughly inspected for damage. Read and understand the entire manual, paying special attention to warning symbols and their meanings. Always follow the initial setup procedures outlined by an authorized Pride Provider or technician. Ensure all parts are securely attached and functioning properly. Test the chair in a safe, open area to familiarize yourself with its operation. Never operate the chair without proper setup and supervision.

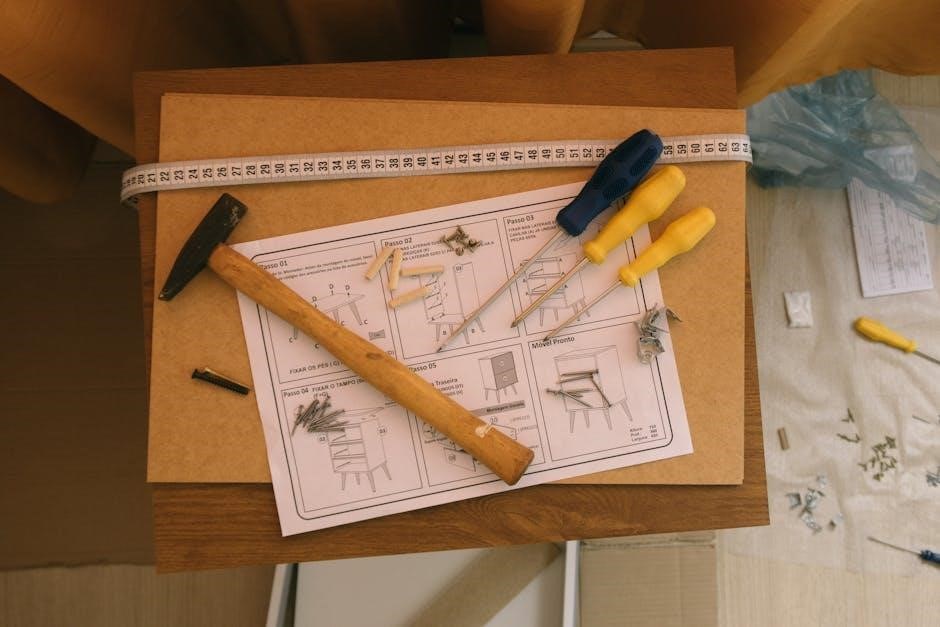
Assembly and Setup
The Pride Go-Chair requires professional assembly by an authorized Pride Provider or technician, following the manual’s guidelines to ensure correct configuration and testing for safe operation.
4.1 Initial Setup Requirements
Initial setup for the Pride Go-Chair must be performed by an authorized Pride Provider or qualified technician. This ensures all components are correctly assembled and tested for safety. The process includes unpacking, assembling, and configuring the chair according to the manual’s instructions. Proper setup guarantees optimal performance and user safety. Users should not attempt self-assembly without professional guidance to avoid potential risks. Always refer to the manual for detailed setup procedures and guidelines.
4.2 Role of Authorized Pride Providers
Authorized Pride Providers play a crucial role in ensuring the proper setup and maintenance of the Go-Chair. These professionals are trained to perform initial assembly, configure settings, and provide user training. They ensure compliance with safety standards and manufacturer guidelines. Their expertise guarantees optimal performance and user safety, making them indispensable for first-time setup and ongoing support. Always rely on authorized providers for accurate and reliable assistance with your Pride Go-Chair.
Charging and Battery Maintenance
Follow the manual’s charging instructions to ensure optimal battery performance. Avoid overcharging and store batteries in a cool, dry place for longevity. Always use approved chargers.
5.1 Charging Procedures
Charge your Pride Go-Chair using the approved charger provided. Connect the charger to the chair’s charging port and plug it into a standard electrical outlet. Ensure the chair is turned off during charging to prevent damage. The charging time varies depending on battery depletion but typically takes 8-12 hours for a full charge. Avoid overcharging, as it may reduce battery longevity. Always refer to the manual for specific charging guidelines and ensure the charger is certified for your model to maintain safety and performance.
5.2 Battery Care Tips
Regularly inspect and maintain your Pride Go-Chair batteries to ensure optimal performance. Avoid extreme temperatures and store batteries in a cool, dry place when not in use. Clean terminals with a wire brush to prevent corrosion. Charge batteries fully before extended storage. Use only approved chargers to prevent damage. If issues arise, consult an authorized technician. Proper care extends battery life and ensures reliable operation of your Go-Chair.

Operating the Pride Go-Chair
The Pride Go-Chair is designed for ease of use, with intuitive controls and functions. Follow driving tips and best practices to ensure smooth and safe operation. Always maintain awareness of your surroundings and adjust speed according to terrain for optimal performance and stability. Regularly review the manual for operational guidelines to maximize efficiency and longevity of your Go-Chair.
6.1 Controls and Functions
The Pride Go-Chair features a user-friendly control panel with a joystick for easy navigation. The joystick allows precise direction control, while the VSI electronics ensure smooth operation. Speed settings can be adjusted to suit different terrains, and the chair includes indicators for battery life and mode selection. The controls are designed for intuitive use, enabling seamless maneuverability and a comfortable riding experience. Always refer to the manual for detailed guidance on optimizing control functions.
6.2 Driving Tips and Best Practices
Always start with a slow speed setting to ensure control, especially in tight spaces. Use the joystick gently and avoid sudden movements. Regularly check your surroundings for obstacles and inclines. Maintain a steady pace on uneven terrain and avoid sharp turns. Keep the battery level in mind to prevent mid-trip power loss. Familiarize yourself with the chair’s turning radius for better maneuverability. Follow these tips to enhance safety and optimize your Pride Go-Chair experience.

Troubleshooting Common Issues
Identify issues like error codes, battery problems, or joystick malfunctions. Refer to the manual for solutions or contact authorized technicians for professional assistance and repairs.
7.1 Identifying and Resolving Problems
Identify common issues such as error codes, battery faults, or joystick malfunctions. Refer to the manual for troubleshooting steps. If problems persist, contact an authorized technician for professional assistance. Regular maintenance and adherence to safety guidelines can prevent many issues. Always follow the manufacturer’s instructions for resolving problems to ensure safety and optimal performance of your Pride Go-Chair.
7.2 When to Contact a Technician
Contact a technician if issues persist after troubleshooting or if complex repairs are needed. This includes damage to electrical components, battery system failures, or software-related problems. Always seek professional help for safety-critical issues. Authorized Pride Providers or qualified technicians are trained to handle such situations, ensuring your Go-Chair operates safely and efficiently. Refer to the manual for guidance on when professional assistance is required.

Maintenance and Repair
The Pride Go-Chair requires regular maintenance to ensure optimal performance. Clean the chair frequently, check battery connections, and schedule professional repairs for complex issues.
8.1 Regular Maintenance Tasks
Regular maintenance is essential to ensure the Pride Go-Chair operates at its best. Clean the chair regularly to remove dirt and debris, especially from the wheels and frame. Check battery connections and ensure they are secure. Inspect tires for proper inflation and signs of wear. Lubricate moving parts as needed and maintain the freewheel levers for proper functionality. Schedule professional checks annually to address any potential issues early.
8.2 Repair Procedures and Recommendations
For repairs, always consult the Pride Go-Chair manual or contact an authorized Pride Provider. Minor issues like loose screws or faulty connections can often be resolved with basic tools. For complex problems, such as electrical malfunctions, professional assistance is recommended. Use genuine Pride parts for replacements to maintain warranty validity. Regular maintenance can prevent many repair needs, ensuring the chair’s longevity and optimal performance.
Accessories and Customization
The Pride Go-Chair offers a wide range of accessories, such as storage bags, seat cushions, and armrest extensions, to customize the chair for individual preferences and needs.
9.1 Available Accessories
The Pride Go-Chair offers a variety of accessories to enhance user experience. These include storage solutions like cargo baskets and trays, seating enhancements such as extra cushions, and practical additions like canopies or lighting kits. Accessories are designed to improve comfort, convenience, and versatility, ensuring the chair meets individual needs. Pride Mobility provides a range of options to customize the Go-Chair, making it adaptable for different lifestyles and preferences. Explore the full list of compatible accessories in the official Pride Mobility product catalog or through authorized providers.
9.2 Customizing Your Go-Chair
Customizing your Pride Go-Chair allows you to tailor it to your specific needs and preferences. From seat height adjustments to armrest modifications, the chair offers versatility for optimal comfort. Additional options like interchangeable color panels and personalized upholstery enable users to match their style. Accessories such as storage solutions and lighting kits further enhance functionality. Pride Mobility provides a range of customization options to ensure the Go-Chair aligns with individual lifestyles and requirements for enhanced mobility and independence.
Comparing the Pride Go-Chair to Other Models
The Pride Go-Chair stands out for its portability, ease of use, and customization options. It surpasses similar models in design and functionality, offering a unique blend of comfort and durability.
10.1 Key Differences from Similar Products
The Pride Go-Chair distinguishes itself with its lightweight frame, intuitive controls, and compact design. Unlike other models, it features advanced portability, a high weight capacity, and customizable options. Its ease of maneuverability and robust battery performance set it apart, making it a superior choice for users seeking both reliability and comfort in a power chair.

Warranty and Support
The Pride Go-Chair comes with a comprehensive warranty and dedicated customer support. Pride Mobility ensures reliable service, providing peace of mind for users and addressing their needs effectively.
11.1 Understanding Your Warranty
The Pride Go-Chair is backed by a comprehensive warranty program, ensuring coverage for parts and labor under specific conditions. The warranty period varies for different components, with the frame typically covered for life and electrical parts for a limited time; It is essential to review the warranty terms to understand what is covered and what may void the agreement, such as unauthorized modifications or misuse. Proper maintenance and adherence to guidelines are crucial to maintaining warranty validity.
11.2 Customer Support Options
Pride Mobility offers comprehensive customer support to ensure a seamless experience with your Go-Chair. From technical assistance to troubleshooting, support is available via phone, email, or online resources. Authorized Pride Providers are also equipped to address inquiries and provide personalized assistance. Additionally, the detailed owner’s manual and online guides serve as valuable resources for resolving common issues and optimizing your Go-Chair’s performance. Pride’s dedicated team is committed to helping you maintain independence and satisfaction with your product.